
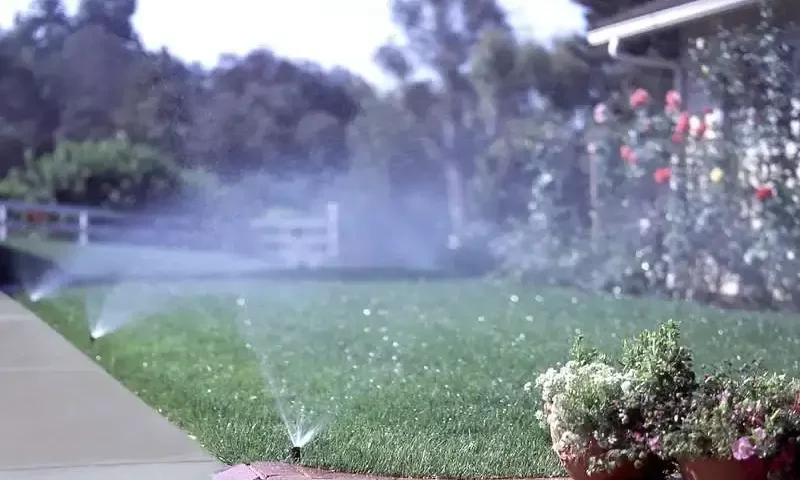
The short answer: a sprinkler installation on a typical GTA property takes one to two days and follows the same five stages every time — an on-site design visit, utility locates, the install itself, commissioning, and a walkthrough with you. Pipe is pulled beneath the turf rather than trenched in, so an established lawn is walkable the same day. This guide sets out exactly what happens at each stage, what you need to do, and what a good installer does that a cheap one skips.
Stage 1: the design visit
Nothing can be priced or planned from a street view, so the first visit is on the property. Three things get measured or recorded:
- Static pressure and available flow at the service. This is the single most important number in the whole job, because it decides how many sprinkler heads a zone can run at the pressure those heads were designed for. Everything else follows from it.
- What actually needs watering — open lawn, garden beds, hedging, anything in deep shade, anything on a slope. Each of those behaves differently and generally belongs on its own zone.
- Where pipe can physically go — side passage widths, driveways and walkways to be crossed, mature root systems, hard landscaping, where the water service enters the house.
You should come away from this visit knowing the proposed zone count and roughly where the heads will sit. If a number is quoted without anyone measuring pressure at the property, it is a guess, and the shortfall tends to show up in the first dry August.
Stage 2: locates and scheduling
Before anyone puts equipment in the ground, underground utilities have to be located and marked — gas, hydro, telecommunications. We arrange that; it is not something a homeowner should be left to organise. Locates take a few working days to come back, which is the main reason an installation is not booked for the day after you accept a quote.
Private services are a different matter. Locate services mark public utilities, not a line you ran to a shed, a pool heater, a gas firepit or low-voltage lighting installed by someone else. If anything like that exists, tell your installer where it is, because nobody else can know.
Stage 3: installation day
This is faster and far less destructive than most people expect. The sequence runs roughly:
- The layout is flagged out on the ground — head positions, zone boundaries, the pipe route. This is the moment to walk it and say something if a head is somewhere you do not want it. Changes are easy now and awkward later.
- Pipe is pulled, not trenched. A vibratory plough or pipe-pulling machine draws the pipe through the soil beneath the turf. The surface is parted rather than opened, so there is no spoil heap and no strip of bare earth across the lawn.
- Driveways and walkways are bored under where a zone has to cross them, rather than cut.
- The valve manifold is installed and the irrigation supply is tied into the house plumbing.
- Wiring is run from the controller position to each valve.
- Heads are set to final grade — flush with the turf, so a mower passes over them.
There is usually some visible disturbance where we cross flowerbeds and at the tie-in point, and we go through where that will be before starting. On the lawn itself, the pulled lines close over within a couple of weeks.
Stage 4: commissioning
This is the stage that separates a system that works from one that merely runs, and it is where a rushed job shows. Commissioning means:
- Every zone run and watched. Not switched on — watched, head by head.
- Arcs and nozzles set individually so each head covers what it is meant to and coverage stops at the property line. Overspray onto a sidewalk or a neighbour's walk is a set-up fault, not something you have to accept.
- Overlap confirmed. Coverage is designed so each head's spray reaches the next one. If that overlap is missing you get dry rings between heads in July, and the only fix at that point is going back into the ground.
- The controller programmed for the current season, not for a generic schedule.
Stage 5: the walkthrough
You should finish the job knowing which zone covers which part of the property, how to adjust run times, how to put the system into rain delay, and who to call. If you can tell the office "zone four, the front right" rather than "somewhere near the driveway", every future visit is shorter and the diagnosis is better.
Keep a note of the zone layout. The single most useful piece of paper a sprinkler owner has is a sketch of which zone is which.
What you need to do
Very little, which surprises people. Be available at the design visit, point out any private underground services, clear anything stacked where the valve box or controller will go, and keep pets off the lawn on installation day. You do not need to be home for the whole install, but being there for the flag-out and the final walkthrough is worth the time.
Can it be installed on an established lawn, or in a new build?
Both, and the timing differs. On an established lawn, trenchless pulling is specifically what makes retro-fitting practical — the turf is parted rather than stripped, so you are not rebuilding the lawn afterwards. Most of our installations are exactly this.
On a new build or a major landscaping project, the system should go in before the sod and the final grade, ideally while the landscaper is still on site. It is cleaner, quicker and usually cheaper than returning to a finished yard, and it lets the zones be designed around the planting plan instead of around whatever has already been installed. If you are at that stage, get the irrigation designer and the landscaper talking to each other early.
What a cheap installation skips
Price differences between quotes almost always come down to one of these, so they are worth asking about directly:
- No pressure measurement — the zone count was assumed rather than calculated.
- Fewer zones. The quickest way to cut a quote. The system runs, under-pressured, and disappoints in the first dry spell. How many zones a lawn needs explains the arithmetic.
- Trenching instead of pulling, which leaves a visible scar across an established lawn.
- Rushed commissioning — heads left unadjusted, so the system waters the driveway for the next decade.
- Sub-contracted crews. Ask who will actually be on the property. We never sub-contract; the crew is on our payroll, which is also why we are still reachable in year six.
- Residential-grade parts that cost less and fail just outside whatever warranty came with them.
After the first season
A new system needs the same two visits a year as any other: a spring start-up and a fall blow-out before the first hard freeze. Winterization is not optional in this climate — water left in a line will split pipe or crack fittings. Our seasonal service packages bundle both visits.
One note on servicing: we happily service, repair, start up, maintain and winterize our existing clients' systems across the GTA. If you have a system installed by someone else and are only looking for seasonal maintenance, that is usually something we cannot take on. If an existing system needs upgrading or significant modification, we may be able to help — give the office a call and we will tell you straight away.
For what a system costs, see the 2026 cost guide. For how we work in your area, the Toronto, Scarborough and Mississauga pages cover local specifics, and the irrigation and sprinkler systems page explains how the systems are built.
Want this costed for your own property? We walk the property with you and put the quote in writing, with no obligation. Book a free on-site quote.
Ready for a Pro Green sprinkler system on your property?
Get a free on-site walkthrough and a written quote within a few days — no obligation.
Get a Free Quote →